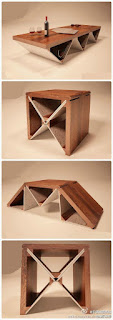
Wooden Box DIY Ideas for Functional Home Office Storage

Unleash Your Inner Carpenter: DIY Wooden Box Office Storage Ideas!

Hey there, fellow organization enthusiasts! Are you tired of that chaotic jumble in your home office? Do overflowing drawers and precarious stacks of papers make you want to scream? Well, grab your hammer and saw because I'm about to share some seriously cool DIY wooden box storage ideas that will transform your workspace from a disaster zone into a haven of calm and productivity. We're talking about functional, stylish, and completely customizable storage solutions, all made with your own two hands (and maybe a little help from a power drill!).

Why Wooden Boxes? Because They’re Awesome!

Before we dive into the projects, let's talk about why wooden boxes are the ultimate home office storage superheroes. First off, wood is beautiful. Seriously, the natural grain and warmth it brings add a touch of rustic charm or sophisticated elegance to any space, depending on the finish you choose. Secondly, wood is durable. Unlike flimsy plastic containers that crack and break, a well-built wooden box will last for years, providing reliable storage for all your office essentials.

And finally, wooden boxes are incredibly versatile. You can stain, paint, decoupage, or even burn designs into them, making them perfectly match your existing décor. They’re also easily customized to fit specific needs and spaces. Whether you need a small box for stationery or a large one for files, the possibilities are endless!

Easy DIY Wooden Box Projects for Your Home Office

Now for the fun part! Here are some DIY wooden box projects you can tackle, regardless of your woodworking skill level. Remember, it’s okay to start small and gradually build your confidence!

The Classic Stackable Box Set

This is a great beginner project. You’ll need some untreated pine boards (easily sourced from any home improvement store), wood glue, wood screws, and a saw (a hand saw will work, but a circular saw makes it much faster). You can find tons of free plans online for building simple stackable boxes. The beauty of this project is you can build as many boxes as you need, in different sizes, to fit your specific storage needs. Consider using different stains or paints to create a visually interesting stack.

Pro Tip: Use a router to create decorative edges on your boxes for a more polished look.

The Under-Desk File Organizer

Running out of filing space? Build a custom under-desk file organizer! You’ll need to measure the space under your desk carefully. Then, you can construct a box with dividers to hold hanging files. This is a slightly more advanced project, but still manageable for intermediate DIYers. You might need some more sophisticated joinery techniques (like dadoes or rabbets) for this project, but there are plenty of tutorials available online.

Pro Tip: Line the bottom of the box with felt or fabric to protect your files and prevent scratching.

The Decorative Desktop Organizer

This project is all about style! Start with a smaller wooden box and get creative with the finishing touches. You could paint it a vibrant color, decoupage it with pretty paper, or even use wood burning techniques to add a personal touch. This little box can hold pens, paper clips, sticky notes, and other desk essentials, keeping your workspace tidy and aesthetically pleasing. Consider adding small brass knobs or handles for an extra touch of elegance.

Pro Tip: Use high-quality paints and sealants to ensure your decorative box lasts.

The Rolling Storage Cart

Want to maximize your space and add some serious organization to your office? A rolling storage cart is the perfect solution. This project involves a bit more woodworking, but the result is an incredibly functional piece of furniture. You'll need to build a sturdy box with drawers or shelves, and then attach some caster wheels to the bottom. This is a great way to store larger items like printer paper, extra supplies, or even small electronics.

Pro Tip: Use heavy-duty casters to ensure your cart can handle the weight of your supplies.

Materials and Tools You'll Need

The exact materials and tools you’ll need will depend on your chosen project, but here’s a general list to get you started:

  • Untreated wood boards (pine, cedar, or other suitable wood)
  • Wood glue
  • Wood screws
  • Saw (hand saw, circular saw, or jigsaw)
  • Drill
  • Screwdriver
  • Measuring tape
  • Pencil
  • Sandpaper
  • Wood stain or paint (optional)
  • Sealer (optional)
  • Handles or knobs (optional)
  • Casters (for rolling carts)

Remember to always prioritize safety when working with tools. Wear safety glasses and follow the instructions carefully.

Beyond the Basics: Taking Your Wooden Box Creations to the Next Level

Once you've mastered the basics, the world of wooden box customization is your oyster! Think about incorporating these advanced techniques to create truly unique and functional storage solutions:

  • Intricate joinery: Explore dovetail joints, mortise and tenon joints, or other advanced joinery techniques for extra strength and a professional look.
  • Customizable dividers: Create adjustable dividers inside your boxes to perfectly accommodate different-sized items.
  • Hidden compartments: Add secret compartments to your boxes for storing valuable items or sensitive documents.
  • Metal accents: Incorporate metal hardware, hinges, or latches for a more sophisticated and industrial look.
  • Unique finishes: Experiment with different stains, paints, and sealants to achieve a wide variety of finishes, from rustic to modern.

Frequently Asked Questions

Q: What type of wood is best for DIY wooden boxes?

A: Pine is a popular and affordable choice for beginners. Cedar is also a good option, as it’s naturally resistant to insects and moisture. However, you can use many different types of wood, depending on your budget and desired aesthetic.

Q: How do I prevent my wooden boxes from warping?

A: Ensure your wood is properly seasoned (dried to the correct moisture content). Use a good quality wood glue and allow ample drying time. Also, consider using wood sealant to protect against moisture.

Q: Where can I find plans for building wooden boxes?

A: You can find tons of free plans online, on websites like Pinterest, Instructables, and Ana White. You can also search for "DIY wooden box plans" on YouTube for video tutorials.

Q: What if I don’t have any woodworking experience?

A: Start with a simple project, like the stackable box set. There are plenty of beginner-friendly tutorials available online. Don't be afraid to ask for help from a more experienced woodworker!

So there you have it! With a little bit of effort and creativity, you can transform your chaotic home office into a beautifully organized and functional space. Get crafting and happy building!

Share:

DIY Wooden Bread Box Ideas You Can Make in Just a Few Hours

DIY Wooden Bread Boxes: Freshly Baked & Freshly Crafted

The aroma of freshly baked bread is a comfort unlike any other. But keeping that bread tasting its best requires more than just skillful baking; it needs proper storage. Forget flimsy plastic containers â€" elevate your kitchen aesthetics and bread preservation with a handcrafted wooden bread box. These DIY projects are surprisingly simple and can be completed in just a few hours, even for beginners. Get ready to unleash your inner craftsman and create a beautiful, functional addition to your home!

Choosing Your Materials and Tools

Before you even think about sawing, take some time to select your materials. A trip to your local lumberyard or even a well-stocked hardware store will reveal a wealth of options. For a beginner-friendly project, consider using pre-cut wood like pine or cedar. These woods are relatively inexpensive, easy to work with, and readily available. Avoid hardwoods like oak or maple for your first attempt, as they're significantly harder to cut and shape accurately. Beyond the wood itself, gather these essential tools: a measuring tape, a saw (a hand saw or circular saw will work), wood glue, clamps, sandpaper (various grits), a wood stain or paint (optional), and a clear sealant.

Essential Tools for Success

Having the right tools makes all the difference. Invest in a good quality saw for clean cuts. Sandpaper is crucial for achieving a smooth finish; start with a coarser grit and gradually move to finer grits for a polished look. Clamps are essential for holding pieces together while the glue dries. And finally, consider a clear sealant to protect your beautiful creation from moisture and wear.

Simple Bread Box Designs: Easy to Build, Beautiful to Behold

The simplest bread box design involves constructing a basic rectangular box. This style requires minimal joinery skills and focuses on clean lines and functionality. You can easily adjust the dimensions to fit your kitchen and baking needs. Another popular option is a slightly more complex design incorporating a hinged lid. This provides better protection for your bread and adds a touch of elegance. Consider adding simple decorative elements like small, routed details or adding metal hinges for a more polished look.

Step-by-Step Guide for a Basic Rectangular Box

  1. Cut your wood: Measure and cut your wood pieces according to your desired dimensions (remember to account for the thickness of the wood when calculating the overall size).
  2. Assemble the sides and bottom: Apply wood glue to the edges and use clamps to hold the pieces together until the glue dries completely.
  3. Attach the top: You can either create a simple removable top or a hinged lid using metal hinges. If using a hinged lid, ensure the hinges are firmly attached.
  4. Sand everything smooth: Use sandpaper to smooth out any rough edges or imperfections, ensuring a comfortable and pleasing finish.
  5. Finish and protect: Apply a stain, paint, or leave the natural wood color visible. Finally, apply a clear sealant to protect your bread box from moisture and prolong its lifespan.

Adding Personal Touches: From Rustic Charm to Modern Elegance

Once you've mastered the basics, the possibilities are endless! Consider adding your own personal touches to create a truly unique bread box. For a rustic look, leave the wood unfinished or use a dark wood stain. For a modern aesthetic, opt for a clean, painted finish in a bold color. You can even personalize it further by adding decorative elements like hand-painted designs, engraved initials, or metal accents. Let your creativity run wild!

Making your own wooden bread box is a rewarding experience. It's a chance to create something beautiful, functional, and entirely your own. So gather your tools, choose your design, and get ready to enjoy the satisfaction of crafting a piece that will become a cherished part of your kitchen for years to come.

Share:

Wooden Box DIY Ideas for Craft Storage and Organization

Unleash Your Inner Craftsperson: DIY Wooden Box Ideas for Ultimate Organization

Tired of tangled yarn, scattered buttons, and paintbrushes hiding in chaotic corners? Transform your craft space from a cluttered mess into an organized haven with these inspiring DIY wooden box projects. These aren't your grandma's boring storage solutions; we're talking personalized, stylish containers that reflect your unique crafting personality. Get ready to reclaim your workspace and celebrate your creativity with these easy-to-follow projects!

Choosing Your Wooden Box Base: The Foundation of Your Creation

The first step in your DIY journey is selecting the perfect wooden box. Consider the size you need â€" will this hold small beads and findings or larger canvases and paints? Think about the wood type too; pine offers a cost-effective and readily available option, while reclaimed wood adds rustic charm and a unique story. You can find unfinished wooden boxes at craft stores, online retailers, or even repurpose old crates or vintage chests for a truly unique project. Don't be afraid to get creative! Measure your crafting supplies to determine the ideal dimensions. A slightly larger box allows for comfortable access and prevents overcrowding.

Personalized Projects: From Simple to Stunning

The Rustic Charm of Stained and Painted Boxes

Embrace simplicity with a beautifully stained or painted wooden box. Choose a stain that complements your existing décor or opt for a vibrant paint color that reflects your personality. Consider distressing the wood for a more vintage aesthetic by gently sanding the edges after painting or staining. Add a personal touch with stencils, decoupage, or even a personalized inscription burned into the wood using a wood-burning tool. A simple coat of sealant protects your masterpiece and ensures longevity.

Compartmentalized Organization: Divide and Conquer

Maximize space and organization with a cleverly compartmentalized box. Use thin strips of wood, craft foam, or even cardboard dividers to create custom compartments perfectly sized for your specific supplies. This is particularly useful for storing small items like beads, buttons, or jewelry findings, preventing them from getting mixed up. You can use glue or small screws to securely attach the dividers. Remember to measure carefully to ensure your compartments fit snugly and securely.

Adding Functional Touches: Handles, Hinges, and More

Elevate your DIY wooden box from simple storage to a statement piece by adding functional details. Install sturdy handles for easy carrying. Choose from a variety of styles, from simple metal knobs to elegant leather straps. If you’re feeling ambitious, consider adding hinges for a lidded box, providing extra protection for your precious crafting supplies. Magnetic closures add a touch of elegance and provide a secure closure without the need for bulky latches.

Beyond the Basics: Creative Storage Solutions

Don't limit yourself to standard boxes! Think outside the box (pun intended!) and consider these unique ideas:

  • Rolling cart: Attach wheels to a larger wooden box for easy mobility around your workspace.
  • Wall-mounted shelves: Create a series of smaller boxes and mount them on the wall to maximize vertical space and display your supplies beautifully.
  • Layered storage: Stack multiple boxes of varying sizes to create a visually appealing and efficient storage solution.
  • Drawer inserts: Build custom inserts for drawers to organize smaller items such as paintbrushes, pencils, or tools.

With a little creativity and effort, you can easily transform ordinary wooden boxes into stunning and functional storage solutions. So, gather your tools, unleash your imagination, and start creating the perfectly organized craft space you've always dreamed of! Remember to always prioritize safety when using tools and work in a well-ventilated area when using paints, stains, or sealants.

Share:

Handcrafted DIY Wooden Bread Box Ideas for Unique Charm

Handcrafted DIY Wooden Bread Box Ideas for Unique Charm

Hey there, fellow bread lovers! Are you tired of those generic plastic bread boxes that look…well, generic? Do you crave something with a little more character, a little more *you*? Then you've come to the right place! Let's dive into the wonderfully warm world of handcrafted DIY wooden bread boxes. We'll explore some unique ideas, discuss the materials you'll need, and even troubleshoot some common challenges. Get ready to unleash your inner artisan!

Why Choose a DIY Wooden Bread Box?

Forget mass-produced plastic! A handcrafted wooden bread box offers so much more. It's a statement piece, a conversation starter, and a testament to your creativity. Think about it: the rich aroma of freshly baked bread wafting from a beautiful, personalized box. It just elevates the entire bread-eating experience, don't you think?

But beyond the aesthetics, there are practical reasons too. Wood is a naturally breathable material, helping to keep your bread fresher for longer (compared to airtight plastic). Plus, it's incredibly durable â€" a quality wooden bread box can last for years, becoming a cherished heirloom.

Choosing Your Wood and Design

The fun really begins here! The type of wood you choose will dramatically affect the final look and feel of your bread box. Here are a few popular options:

Popular Wood Types:

  • Pine: Affordable, readily available, and easy to work with, making it perfect for beginners.
  • Cedar: Naturally aromatic and insect-repellent, offering a lovely scent and protecting your bread.
  • Oak: A classic choice known for its strength and beautiful grain patterns. It’s a bit more challenging to work with but worth the effort.
  • Walnut: A luxurious option with rich, dark tones and stunning grain. Prepare for some serious woodworking skills!
  • Reclaimed Wood: Give old wood a new life! Reclaimed wood adds character and sustainability to your project. Just be sure to check for any lingering pests or damage before you start.

Once you’ve chosen your wood, it's time to consider the design. Do you envision a simple, rustic box? Or something more intricate, perhaps with carved details or a unique shape?

Design Ideas:

  • Classic Rectangular Box: A timeless design that's always a winner. Simple to construct, perfect for beginners.
  • Shaped Box (e.g., Loaf of Bread): A more challenging but rewarding project. This allows you to get really creative with the overall look.
  • Box with a Sliding Lid: A clean and functional design that keeps your bread safe from dust and crumbs.
  • Box with a Hinged Lid: A traditional choice that adds a touch of elegance. Requires careful attention to hinge placement and alignment.
  • Painted or Stained Box: Add a pop of color or enhance the wood's natural beauty with a stain. Experiment with different finishes for a truly personalized look.

Tools and Materials You'll Need

Before you begin, gather your supplies. The exact list will vary depending on your chosen design, but here's a general overview:

  • Wood: Select your wood based on the design and your skill level.
  • Saw (hand saw or circular saw): For cutting the wood to size.
  • Sandpaper (various grits): To smooth the wood and create a flawless finish.
  • Wood Glue:
  • Clamps: To hold the pieces together while the glue dries.
  • Screws or Nails (optional): For added strength and security.
  • Wood Finish (stain, paint, varnish, etc.): To protect the wood and enhance its appearance.
  • Measuring Tape and Pencil:
  • Safety Glasses and Dust Mask:
  • Hinges (if using a hinged lid):
  • Handles (optional):

Step-by-Step Guide (for a Simple Rectangular Box)

Let's walk through building a basic rectangular bread box. Remember, this is a simplified guide. More complex designs will require more detailed instructions. You can find many detailed tutorials online â€" just search for “DIY wooden bread box plans”

  1. Cut the Wood: Cut your chosen wood into the required pieces for the sides, bottom, and lid.
  2. Assemble the Box: Apply wood glue to the edges and join the sides and bottom pieces. Clamp them firmly in place until the glue is dry.
  3. Sand the Box: Once the glue is dry, sand down any rough edges and imperfections. Start with coarser sandpaper and gradually move to finer grits.
  4. Create the Lid: Cut a piece of wood slightly larger than the top of the box to create the lid. Attach it with hinges if desired, or simply let it sit on top.
  5. Apply Finish: Apply your chosen wood finish. Allow ample drying time between coats.

Adding Your Personal Touch

This is where your creativity truly shines! Consider these options to make your bread box truly unique:

  • Inlay Work: Add small pieces of contrasting wood to create intricate patterns.
  • Burning/Carving Designs: Add personalized designs or quotes.
  • Stencils and Painting: Create a colorful design using stencils and paint.
  • Metal Hardware: Use decorative hinges, latches, or handles to enhance the look.

Commonly Asked Questions

Q: What's the best wood for beginners?

A: Pine is a great choice for beginners due to its affordability and ease of use.

Q: How do I prevent warping?

A: Ensure your wood is properly dried before starting. Use quality wood glue and clamps to prevent gaps. Apply finish evenly to prevent uneven moisture absorption.

Q: How long does it take to make a wooden bread box?

A: The time required depends on the complexity of the design and your experience level. A simple box might take a few hours, while a more intricate project could take days or even weeks.

Q: Where can I find plans for more complex designs?

A: Search online for "DIY wooden bread box plans" or check woodworking websites and blogs. Pinterest is also a fantastic resource for inspiration.

So, there you have it! A journey into the wonderful world of DIY wooden bread boxes. Remember, the most important ingredient is your own creativity and passion. Have fun, enjoy the process, and savor the aroma of freshly baked bread kept in your beautiful, handcrafted box!

Share:

Custom Wooden Box Designs for Personalized Style

Custom Wooden Box Designs for Personalized Style

In a world of mass-produced goods, the allure of handcrafted, personalized items remains strong. Custom wooden boxes offer a unique blend of practicality and artistry, allowing you to create a truly bespoke piece that reflects your individual style and serves a specific purpose. From storing precious jewelry to holding cherished mementos, a custom wooden box transcends mere utility; it becomes a statement piece, a conversation starter, and a testament to your refined taste.

Unleashing Your Creative Vision: Design Possibilities

The beauty of commissioning a custom wooden box lies in the boundless creative freedom it affords. Forget generic, mass-produced containers. With a custom design, you dictate every detail, from the wood type to the finish, ensuring a product perfectly aligned with your aesthetic preferences and functional needs. Imagine a sleek, minimalist box crafted from rich walnut, its clean lines punctuated by subtle brass hinges. Or perhaps a rustic, farmhouse-style box made from reclaimed pine, its surface bearing the charming imperfections of its past life. The possibilities are truly endless.

Choosing the Perfect Wood

The selection of wood significantly impacts the final look and feel of your box. Consider the following options:

  • Oak: Known for its strength and durability, oak offers a classic, sophisticated look.
  • Cherry: Possessing a rich, reddish-brown hue, cherry wood lends an elegant and warm feel to the box.
  • Walnut: Celebrated for its deep, chocolatey tones and beautiful grain patterns, walnut exudes luxury and refinement.
  • Maple: A lighter-colored wood with a fine, even grain, maple provides a clean, contemporary aesthetic.

Personalizing Your Design: Beyond the Wood

Beyond the wood itself, numerous customization options enhance the uniqueness of your box. Consider incorporating:

  • Engraving: Add a monogram, a special date, or a personalized message for a truly sentimental touch.
  • Inlay: Elevate your box with contrasting wood inlays or precious metals for an exquisite, handcrafted feel.
  • Hardware: Choose from a range of hinges, latches, and handles to complement your box's style, from rustic iron to sleek, modern chrome.
  • Finish: Select a finish that protects the wood and enhances its natural beauty. Options range from a simple clear coat to a rich stain or a polished lacquer.

Functional Considerations: Size, Shape, and Purpose

While aesthetics are paramount, the functionality of your custom wooden box is equally important. Consider the intended use. Will it house delicate jewelry, requiring a lined interior and secure closure? Or perhaps it's designed for storing larger items, demanding a more robust construction and larger dimensions? A well-designed box seamlessly integrates form and function, creating a piece that is both beautiful and practical. The size and shape should be meticulously planned to fit its contents perfectly. Consider adding dividers or compartments for better organization.

Finding the Right Craftsperson: Bringing Your Vision to Life

To achieve the perfect custom wooden box, finding a skilled and experienced woodworker is crucial. Research local artisans or online marketplaces specializing in handcrafted wooden goods. Review portfolios, read testimonials, and communicate your vision clearly to ensure your expectations are met. The process of collaborating with a craftsperson to bring your unique design to life is a rewarding experience in itself, resulting in a treasured piece you'll cherish for years to come.

Share:

How to make a flower box out of wood


How to make a flower box out of wood

I am Davidj: Wood Pallet Flower Box

I am Davidj: Wood Pallet Flower Box

One Rustic Thanksgiving Table: Two Centerpiece Ideas

One Rustic Thanksgiving Table: Two Centerpiece Ideas

Mary May Carving the Leaves for a Camellia Flower.mov

Mary May Carving the Leaves for a Camellia Flower.mov

16 Incredible Handmade Planter Ideas That You Can Easily DIY

16 Incredible Handmade Planter Ideas That You Can Easily DIY

Hi there This really is details about How to make a flower box out of wood A good space i'm going to express in your direction I know too lot user searching Can be found here Honestly I also like the same topic with you Information is you need How to make a flower box out of wood Hopefully this review pays to back, truth be told there however lots information and facts out of onlineyou may together with the Boardreader place the important thing How to make a flower box out of wood you should came across a considerable amount of content and articles relating to this

About How to make a flower box out of wood could be very trendy and additionally everyone presume a lot of times that come The following is a little excerpt an essential subject linked to this topic
Share:

Parts of a wood fence


Parts of a wood fence

Farm fencing Tractor Supply Co.

Farm fencing Tractor Supply Co.

Cable Railing Systems: Posts, Wire, & Cable Railing Kits

Cable Railing Systems: Posts, Wire, & Cable Railing Kits

Shaper Outfeed Fence with Power Feeder

Shaper Outfeed Fence with Power Feeder

Fence Shop Drawings

Fence Shop Drawings

Hello If you searching for Parts of a wood fence The perfect set most definitely i'll reveal you Many user search Here i show you where to get the solution In this post I quoted from official sources When you re looking for Parts of a wood fence Let's hope this pays to back to you, in that respect there however lots advice out of onlineit is easy to with the Boardreader put in the real key Parts of a wood fence you'll discovered plenty of content about it

Sharing Parts of a wood fence may be very famous in addition to most of us imagine quite a few many months to return Here is mostly a smaller excerpt a very important topic connected with this pdf
Share:

人気の投稿

Mogelijk gemaakt door Blogger.